Stay connected during the transition - Join our Discord community today.
Simulator Discussions
- Home
- :
- Developer Network
- :
- Simulator Discussions
- :
- Re: NetApp OnTap Simulator 9.7 - How to change default disk sizes
Simulator Discussions
- Subscribe to RSS Feed
- Mark Topic as New
- Mark Topic as Read
- Float this Topic for Current User
- Bookmark
- Subscribe
- Mute
- Printer Friendly Page
NetApp OnTap Simulator 9.7 - How to change default disk sizes
- Mark as New
- Bookmark
- Subscribe
- Mute
- Subscribe to RSS Feed
- Permalink
- Report Inappropriate Content
I am attempting to deploy a new single node 9.7 OnTap Simulator on vSphere v6.7. We deployed it successfully, but when it deployed, it defaulted to creating 14 x 1Gb disks with the root aggregate. We have enough space allocated that I can have 56 x 4Gb disks (that is what we used for the previous 9.5 deployment).
Thanks to this extremely helpful thread (https://community.netapp.com/t5/Simulator-Discussions/ONTAP-Simulator-Fixes-MEGA-Thread/td-p/11213) I was able to create 28 x 4Gb and build a new aggregate. Unfortunately, since this is a single node cluster, the system node migrate-root command does not work. So, I am attempting to follow these procedures to move vol0 to a new aggregate (https://kb.netapp.com/Advice_and_Troubleshooting/Data_Storage_Software/ONTAP_OS/How_to_move_mroot_to_a_new_root_aggregate_in_a_single_node_cluster). But, when I go into maintenance mode and run the "aggr options new_aggr0 ha_policy cfo" command, it just hangs and never completes.
Can anyone tell me why this is hanging?
Or, am I just complicating this entire process? Is there a way to get it to deploy using the 4Gb disks? Or, a way to wipe the config from the boot menu and have it redeploy with 4Gb disks?
Any help is appreciated.
Solved! See The Solution
- Mark as New
- Bookmark
- Subscribe
- Mute
- Subscribe to RSS Feed
- Permalink
- Report Inappropriate Content
On a brand new sim, you can change it in the loader prior to the first boot:
setenv bootarg.vm.sim.vdevinit "31:14:0,31:14:1"
setenv bootarg.sim.vdevinit "31:14:0,31:14:1"
- Mark as New
- Bookmark
- Subscribe
- Mute
- Subscribe to RSS Feed
- Permalink
- Report Inappropriate Content
If you're okay with reinstalling, you can see if an option 4a from the boot menu may help with recreating the appropriate root volume.
Although this would include the smaller 1gb drives. Are you able to remove these from the instance from vcenter before running the 4a at the boot menu?
- Mark as New
- Bookmark
- Subscribe
- Mute
- Subscribe to RSS Feed
- Permalink
- Report Inappropriate Content
The drives aren't really defined in VMWare. In VMWare, it shows that there are 4 hard disks:
Hard disk 1: 1.89 Gb
Hard disk 2: 1.50 Gb
Hard disk 3: 4.75 Gb
Hard disk 4: 230.70 Gb
I'm not sure that we can change these. The gentlemen that did the OVA install said that this was just how the OVA deployed the disks. He didn't choose anything.
I tried doing the reboot and the selected option 4 from the boot menu (there is no 4a), and it re-initializes the disks, but it creates the root aggregate on the small 1Gb disks again, even though there are 4Gb disks available.
- Mark as New
- Bookmark
- Subscribe
- Mute
- Subscribe to RSS Feed
- Permalink
- Report Inappropriate Content
Hi Jim,
If you are prepared to wipe your node clean, I suggest you start with this document:
When you get to step 4, destroy all of the existing disks in the simulator:
rm ,disks/*NETAPP*
rm ,disks/,reservations
echo “” > ,disks/Shelf*
Then use the makedisks script to create the number and types of disks you desire.
Reboot the node and choose menu item 4 to reinitialize the disks.
When the node reboots, you will have a fresh new ONTAP simulator to add to your cluster.
- Mark as New
- Bookmark
- Subscribe
- Mute
- Subscribe to RSS Feed
- Permalink
- Report Inappropriate Content
Thanks, @derekb.
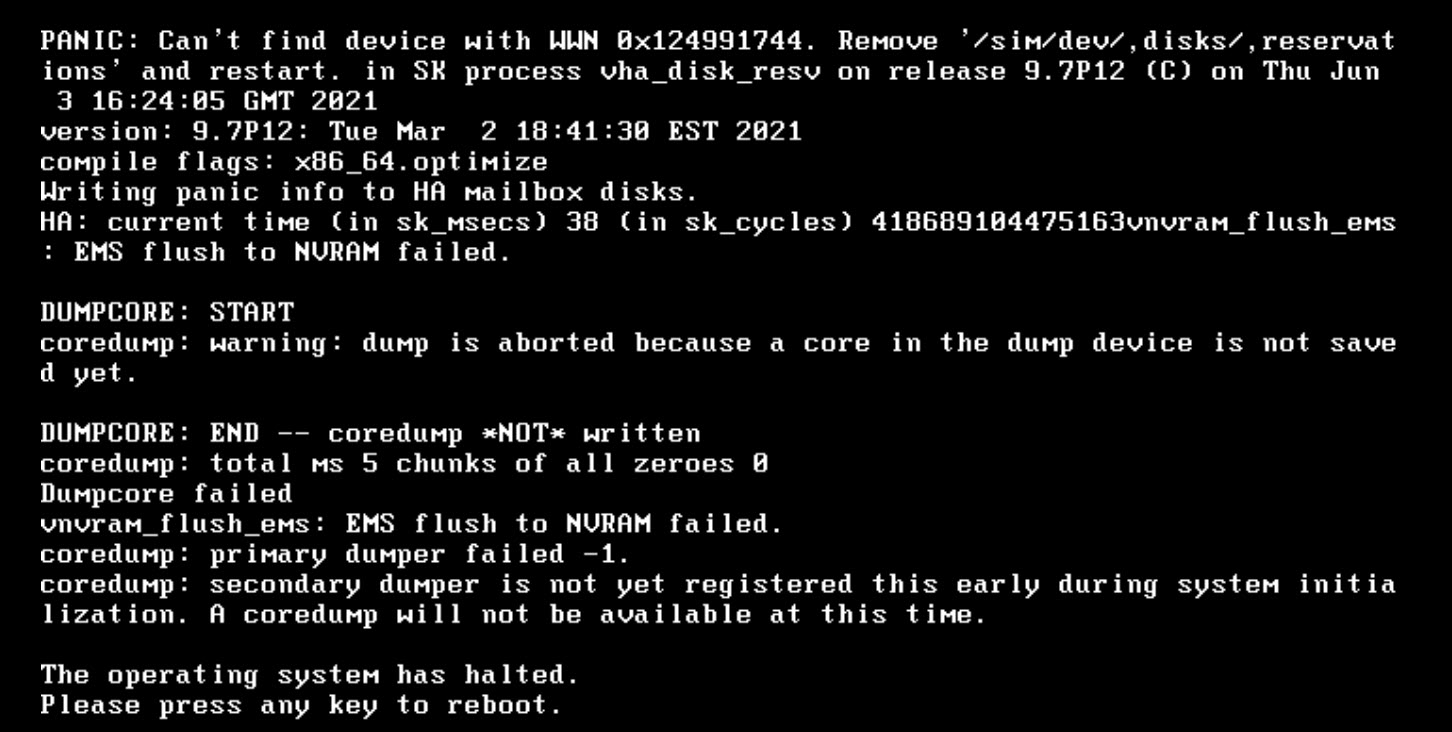
I did delete all the disks, but I didn't remove the reservations or do the echo command. Now, the simulator won't boot at all (see attached screenshot). Would I have avoided this if I hadn't missed those two steps? We are going to redeploy the OVA tomorrow, so I'm hoping I can give it another try.
I was hesitant to delete the disks that had the root aggregate on them because I was afraid something like this would happen. But, it just would not let me move the root aggr to a new aggregate, so I deleted them as a last ditch effort. Obviously that didn't work out 😀. If you delete ALL of the simulated disks, how does it have any OS to boot from?
- Mark as New
- Bookmark
- Subscribe
- Mute
- Subscribe to RSS Feed
- Permalink
- Report Inappropriate Content
On a brand new sim, you can change it in the loader prior to the first boot:
setenv bootarg.vm.sim.vdevinit "31:14:0,31:14:1"
setenv bootarg.sim.vdevinit "31:14:0,31:14:1"
- Mark as New
- Bookmark
- Subscribe
- Mute
- Subscribe to RSS Feed
- Permalink
- Report Inappropriate Content
Thank you, @SeanHatfield!!!! This even fixed my VM that I broke! So, double points for that fix!
